Simulate a Web Form POST Request |
||
|
| ||
|
Submitted on August 7, 2002 Note! This article applies only to Clever Internet Suite version 2.5 thru 3.0. Currently the newer version of the Clever Internet Suite 6.2 is available. This new version provides more powerful interface for building HTTP requests. Please see the Simulate a Web Submit Wizard with POST Request article in order to learn more about using of HTTP request builder. Also please check the How to migrate to the Clever Internet Suite Version 5.0 article. In this article we will discuss the automation of the upload process via HTTP protocol by the POST method using the Internet components from Clever Internet Suite. A lot of web-software companies have to establish the tight links with their clients by using not only email and forums. Often there is the task to transmit data from the client to the server where the initiative belongs to the client. The traditional ways to solve this problem, such as send data via email attach or by FTP, cannot be applied in particular cases. The email has the problems of low efficiency and difficulties when sorting. The write-accessed FTP resources are the problem too, because of the security requirements and the probability of getting spam. If you want to get more control on the process or perform some actions on the received information then using the upload via HTTP protocol by the POST method will solve the above problems simultaneously
The data-transfer method via HTTP protocol is intended to have two key facilities which support the contacts between the server and the client:
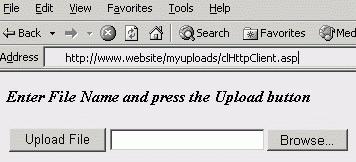
The responsibilities of the client are to build and send the server the message which contains some headers with information about the resource being downloaded, the resource itself and probably, different additional data. The server should be able to accept and process this message. Depending on your desire, the accepting facility may just save it locally to the server, forward it into other server, check for viruses and so on - the resource is fully under your control! Next, let's take a look at these facilities in details. Client-side engineIn the simplest case, the facility which transfers data may be an ordinary client script. Its main purpose is to build the POST command, find the information being sent and specify the resource accepted this data. It's easy to say that in HTML:
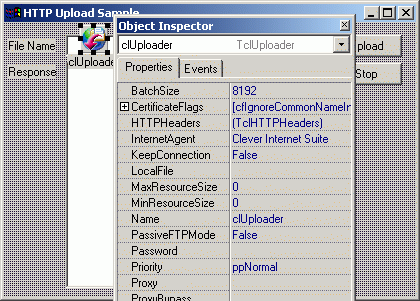
How you can see from the above example, the form we created organizes the bmethod with multipart/form-data type. It means now you shouldn't worry any longer - your browser will care about any headers and their contents itself. For more information on URL-encoding and the format of a Form POST request, see section 8.2 in RFC 1866, which you can find here: http://www.w3.org/Protocols/HTTP/Object_Headers.html, In case of automation the downloading process by using the POST method we have to build such headers and send them to the server ourselves. Let's use the abilities of the TclUploader from the Internet Components - Clever Internet Suite library. It can be done in a few simple steps:
All additional settings can be skipped in order to this article be brief.
Headers Setup In many cases, the server does not respond appropriately if a Content-Type is not specified. Therefore in our case the header may look like this:
As it can be seen from the above example, it is convenient to split the header into some parts:
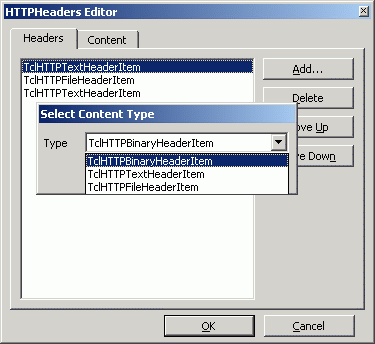
In that way, we set the Header Item Content Type for the first and the third parts as ctTextData, and the second has ctFileName. To setup headers the TclUploader component has the design-time editor.
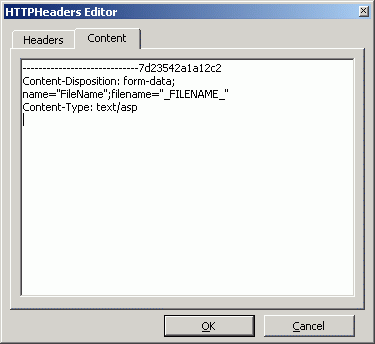
The contents of each header element can be edited within the second page of the component-editor.
Also, it is easy to create the Header Item in runtime. To make the creation process more simple, the headers collection class, TclHTTPHeaders, has a number of the special functions. By using them you can build different header structures as easy and fast as in design-time.
To initiate the uploading process you have to call the Start method of the TclUploader component.
As the result of the upload the server may return the answer which can consists of the custom text or other data defined by the developers of the accepting facility. To get the server's answer you just need to read the ServerResponse property of the component.
Due to the fact that we use the HTTPSendRequestEx function from the WinInet library the uploading process can be given a progress indicator. To do it, let's just write a handler of the OnDataItemProceed event.
Starting at this moment, the client-side is fully functional. The example can be downloaded here: httppostclient.zip for Delphi and httppostclient_bcb.zip for C++ Builder. Next, we'll take a look at the server-side accepting facility. Server-side engineThe server facility isn't a big difficulty at all and in the very first approach it can be written as ASP server script. To work well, the script should accept the incoming data. We use the server Request and Response objects to accept data and send results back to the client. You can retrieve the values of the form elements by using the Forms property of the Request object and by using the BinaryRead method to get raw binary data. Notice, there is one interesting moment - if you use the BinaryRead method, you cannot use the Forms property simultaneously, and vice-versa. So, if you want to post other form data along with your file, you'll have to dig it out of the posted data by hand. The headers parser can be developed in many ways. The widest method is using the special written ActiveX component. ASP server script just transfers binary data to this object. Easier to say in Java Script:
The implementation of the ActiveX component is easy and may look like as following:
To make this sample, we created the ActiveX Library in Delphi and added a new Automation Object named clHTTPPost. The sources of the server-side can be downloaded here: httppostserver.zip for Delphi and httppostserver_bcb.zip for C++ Builder. The server-side facility is done now. You may write the complete header parsing in ASP script itself. This way can be more convenient some time, because it avoids the ActiveX registration. To read more about this technique see the "Upload Files with HTML Forms and Pure ASP" article in MSDN library. Anyway, you have to be sure for the save operation to work, your IIS anonymous user account, usually IUSR_machinename, must have write access to the directory you want to save the files in. And, obviously, the full urlpath to the accepting script must be specified in the URL property of the TclUploader component. In conclusion we would like to notice that the given method of data sending have some benefits in comparing to the Web Form Post request, when using the certified authorization. The point is that while authorizing an HTML form resends the built headers and if the server requests certificate, all headers will be sent twice within the certificate information. This process doesn't occur if you use Clever Uploader because it uses both HTTPSendRequest and HTTPSendRequestEx from the WinInet library. Such method allows you to keep the traffic low when transferring a lot of data. If you want you may not use the UI at all and this allows you to automate the sending process which can be easy scheduled later. All sample used in this article can be downloaded here: Borland Delphi sample: Borland C++ Builder sample: Sergey Shirokov, |


